Understanding 5S Floor Marking Pricing
- Albert Chilat

- Mar 18
- 4 min read
When you think about improving safety and efficiency in your warehouse or manufacturing facility, floor marking is one of the most effective tools you can use. It helps organise space, guides movement, and highlights hazards. But before you start, understanding the costs involved in 5S floor marking is essential. This knowledge helps you plan your budget and ensures you get the best value for your investment.
What Is 5S Floor Marking and Why Does It Matter?
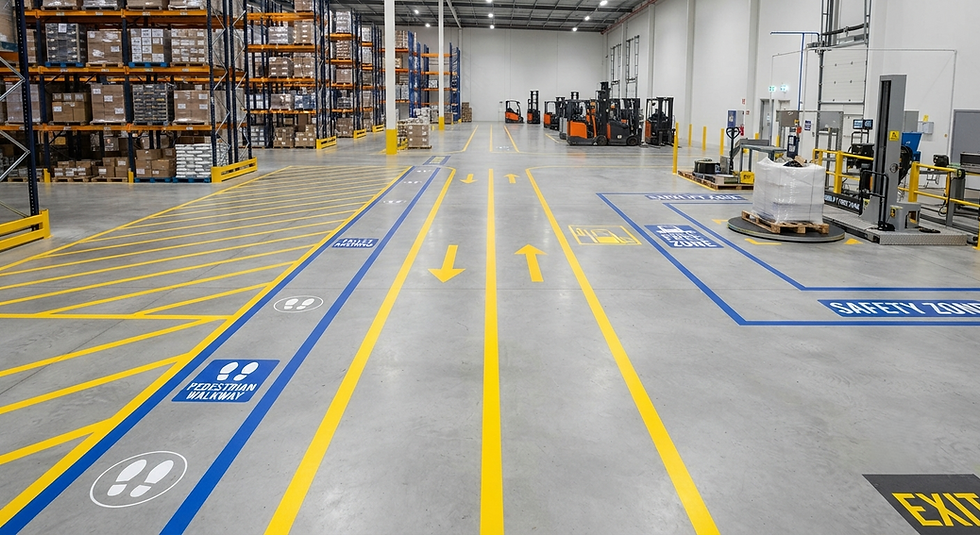
5S is a workplace organisation method that stands for Sort, Set in order, Shine, Standardise, and Sustain. Floor marking plays a crucial role in the "Set in order" phase. It visually defines work areas, walkways, storage zones, and safety boundaries. This clarity reduces confusion and accidents, making your facility safer and more efficient.
Floor marking materials vary, including tapes, paints, and thermoplastic markings. Each has different durability, application methods, and costs. Choosing the right type depends on your facility’s needs, traffic levels, and budget.

5S Floor Marking Pricing: What Influences the Cost?
Several factors affect the price of 5S floor marking. Understanding these will help you make informed decisions.
1. Material Type
Tape: Usually the most affordable option. It’s easy to apply and replace but less durable.
Paint: Offers a more permanent solution. It requires more preparation and drying time but lasts longer.
Thermoplastic: The most durable and expensive option. It withstands heavy traffic and harsh conditions.
2. Area Size
The larger the area you want to mark, the higher the cost. This includes the length and width of lines, plus any symbols or text you want to add.
3. Complexity of Design
Simple straight lines cost less than complex shapes, logos, or multi-colour markings. Custom designs require more time and skill, increasing labour costs.
4. Labour and Installation
Professional installation ensures quality and compliance with 5S standards. Labour costs vary depending on the region and the installer’s expertise.
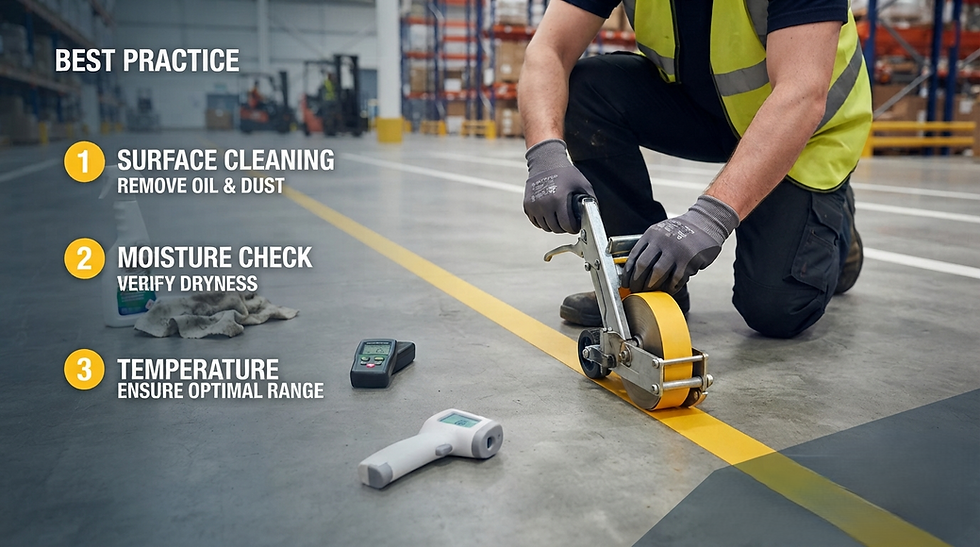
5. Surface Preparation
If your floor needs cleaning, repairs, or priming before marking, this adds to the cost. Proper preparation is vital for durability.
6. Maintenance and Replacement
Consider ongoing costs. Tape may need frequent replacement, while paint and thermoplastic last longer but might require touch-ups.
How to Budget for 5S Floor Marking
Budgeting for floor marking involves more than just the initial application. Here’s a step-by-step approach to help you plan effectively:
Assess Your Needs
Walk through your facility and identify areas that need marking. Note the size and type of markings required.
Choose the Right Material
Balance cost with durability. For high-traffic zones, investing in paint or thermoplastic may save money long-term.
Get Multiple Quotes
Contact several suppliers or contractors. Compare prices, services, and warranties.
Include Preparation and Labour
Don’t forget to budget for floor cleaning, repairs, and professional installation.
Plan for Maintenance
Set aside funds for future touch-ups or replacements.
By following these steps, you can avoid surprises and ensure your floor marking project stays within budget.

Practical Tips to Reduce 5S Floor Marking Costs
You can manage your floor marking expenses without compromising quality. Here are some practical tips:
Prioritise High-Impact Areas
Start with zones that affect safety and workflow the most. You can expand later as budget allows.
Use Tape for Temporary or Low-Traffic Areas
Tape is cost-effective for areas that don’t see heavy use or where markings may change frequently.
Schedule During Downtime
Plan installation during off-hours to avoid disrupting operations and incurring overtime charges.
Maintain Regularly
Clean and inspect markings to extend their life and avoid costly replacements.
Train Staff
Educate your team on the importance of floor markings to prevent damage and ensure compliance.
Why Investing in Quality Floor Marking Pays Off
While it might be tempting to choose the cheapest option, investing in quality floor marking saves money and improves safety in the long run. Durable markings reduce the need for frequent replacements and minimise downtime. Clear, professional markings also help you meet regulatory requirements and demonstrate your commitment to workplace safety.
If you want to learn more about the typical 5s floor marking cost, visiting a specialised provider’s website can give you detailed pricing and options tailored to your facility.
Planning Your 5S Floor Marking Project
Before you start, create a detailed plan. Include:
Mapping the Facility
Draw a layout showing where each marking will go.
Selecting Materials
Choose based on traffic, environment, and budget.
Scheduling Installation
Coordinate with your team to minimize disruption.
Setting Maintenance Procedures
Define who will inspect and maintain markings regularly.
This planning ensures your project runs smoothly and delivers the expected benefits.
Enhancing Safety and Efficiency with 5S Floor Marking
Floor marking is more than just lines on the floor. It’s a visual communication tool that guides behavior and supports a safer, more organized workplace. When done right, it reduces accidents, improves workflow, and boosts productivity.
By understanding the costs and planning carefully, you can implement effective 5S floor marking that meets your facility’s needs and budget.
Taking the time to understand 5S floor marking pricing helps you make smart decisions. It ensures your investment supports your goals of safety and efficiency without unnecessary expense. With the right approach, your facility will benefit from clear, durable markings that stand the test of time.

Comments